[gmc_recipe 1134]
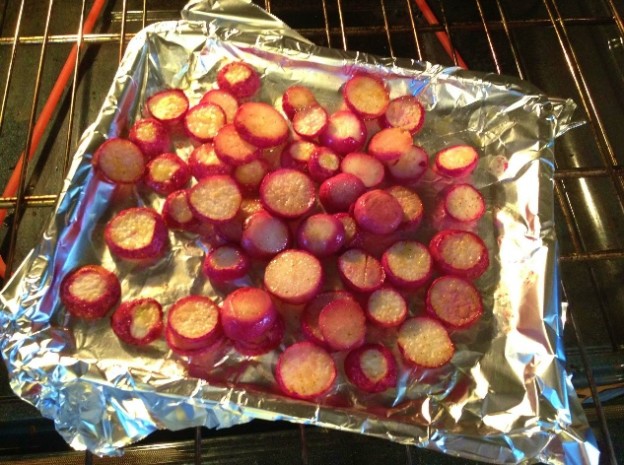
Roasted Radishes
Leave a reply
[gmc_recipe 1134]


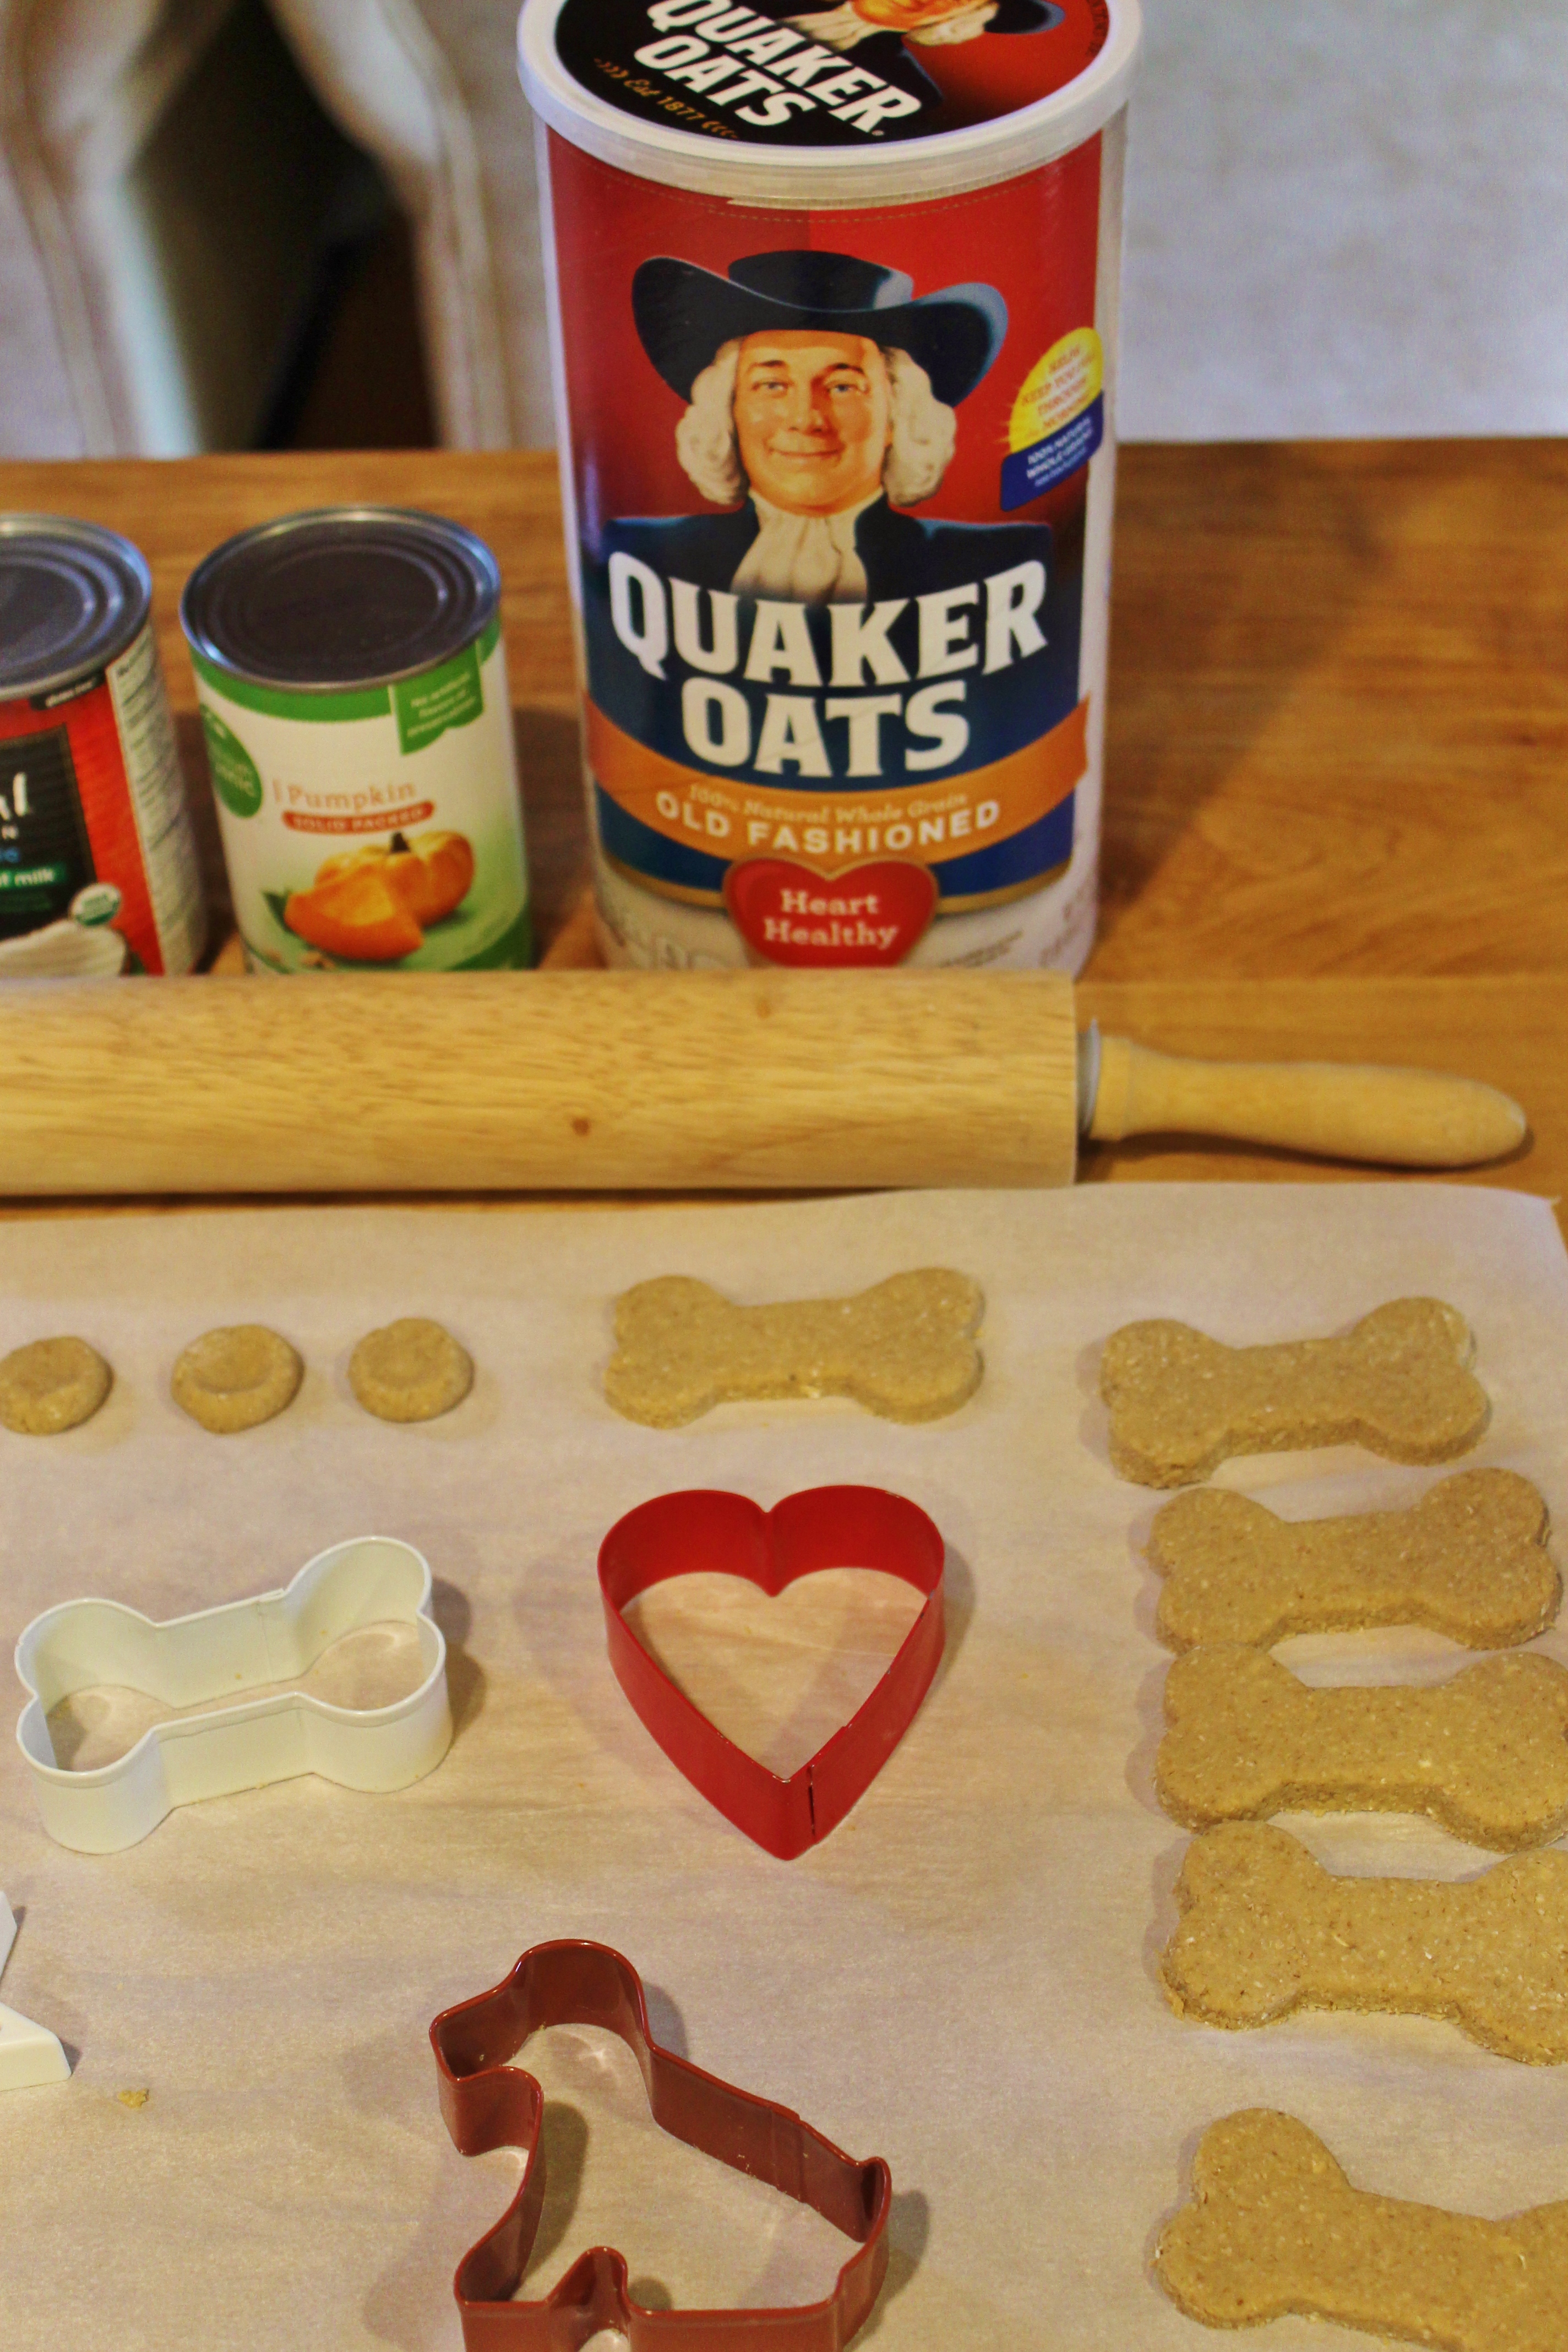
HEALTHY DOG TREATS
Every month or so I stand in the pet aisle of my local grocery store in an effort to find the best (or least offensive) healthy dog treats for my beloved pups. It’s the same confusing dilemma each time while I look for treats made in the USA, treats that don’t contain harmful ingredients, harmful preservatives, yada, yada. More and more I hear about peoples’ pets that suffer from skin allergies and intestinal abnormalties and that are thought to be wheat intolerant. So why not consider a gluten free option for our pets too? I’m usually able to narrow the selection down to the “least offensive”, but the price tag on these treats is highly offensive. Really! The newer options for healthy dog treats can break the bank, especially if you have more than one dog.
Cooking is something I love to do. So why not whip up my own dog treats?! That’s exactly what I did and I’ll never again waste hard earned money or subject my dogs to the low quality and expensive stuff that’s sold in our stores today.
I made three different kinds of treats and here’s how I did it….

*Helpful tip: When kneading dough lightly dust hands with oat flour
Preheat oven to 350 degrees
1. Wisk together oat flour and salt
2. Wisk together egg and stock
3. Slowly pour egg mixture into flour mixture
4. Add water slowly while folding dough
5. Fold with pastry spatula until dough begins to pull away from sides of bowl
6. Sprinkle one tsp of oat flour onto parchment paper
7. Knead dough into baseball sized balls and roll with pin to approximately 1/4 inch thickness
8. Cut with cookie cutters and place on parchment paper lined cookie sheet
9. With extra dough, roll into nickle sized balls for smaller treats
10. Push treat sized balls down with thumb to flatten
11. Bake for 30 minutes
Allow to cool. Refrigerate or freeze to maintain freshness

*Helpful tip: When kneading dough lightly dust hands with oat flour
Preheat oven to 350 degrees
1. Wisk together oat flour and cinnamon
2. Wisk together pumpkin, coconut oil and maple syrup
3. Slowly pour pumpkin mixture into flour mixture
4. Add water slowly while folding dough
5. Fold with pastry spatula until dough begins to pull away from sides of bowl
6. Sprinkle one tsp of oat flour onto parchment paper
7. Knead dough into baseball sized balls and roll with pin to approximately 1/4 inch thickness
8. Cut with cookie cutters and place on parchment lined cookie sheet
9. With extra dough, roll into nickle sized balls for treat size
10. Push treat sized balls down with thumb to flatten
11. Bake for 30 minutes
Allow to cool. Refrigerate or freeze extra to maintain freshness


*Helpful tip: When kneading dough lightly dust hands with oat flour
Preheat oven to 350 degrees
1. Wisk together oat flour coconut oil and peanut butter
2. Slowly add water and fold until mixture pulls away from sides of bowl
3. Sprinkle one tsp of oat flour onto parchment paper.
4. Knead dough into baseball sized balls and roll to about 1/4 inch thickness
5. Cut with cookie cutters
6. With extra dough, roll into nickle sized balls for treat size.
7. Push treat sized balls down with thumb to flatten
8. Bake for 30 minutes
Allow to cool. Refrigerate or freeze extra to maintain freshness
 Your pups will love them. And so will their friends!


 Beautifully Roasted Vegetables
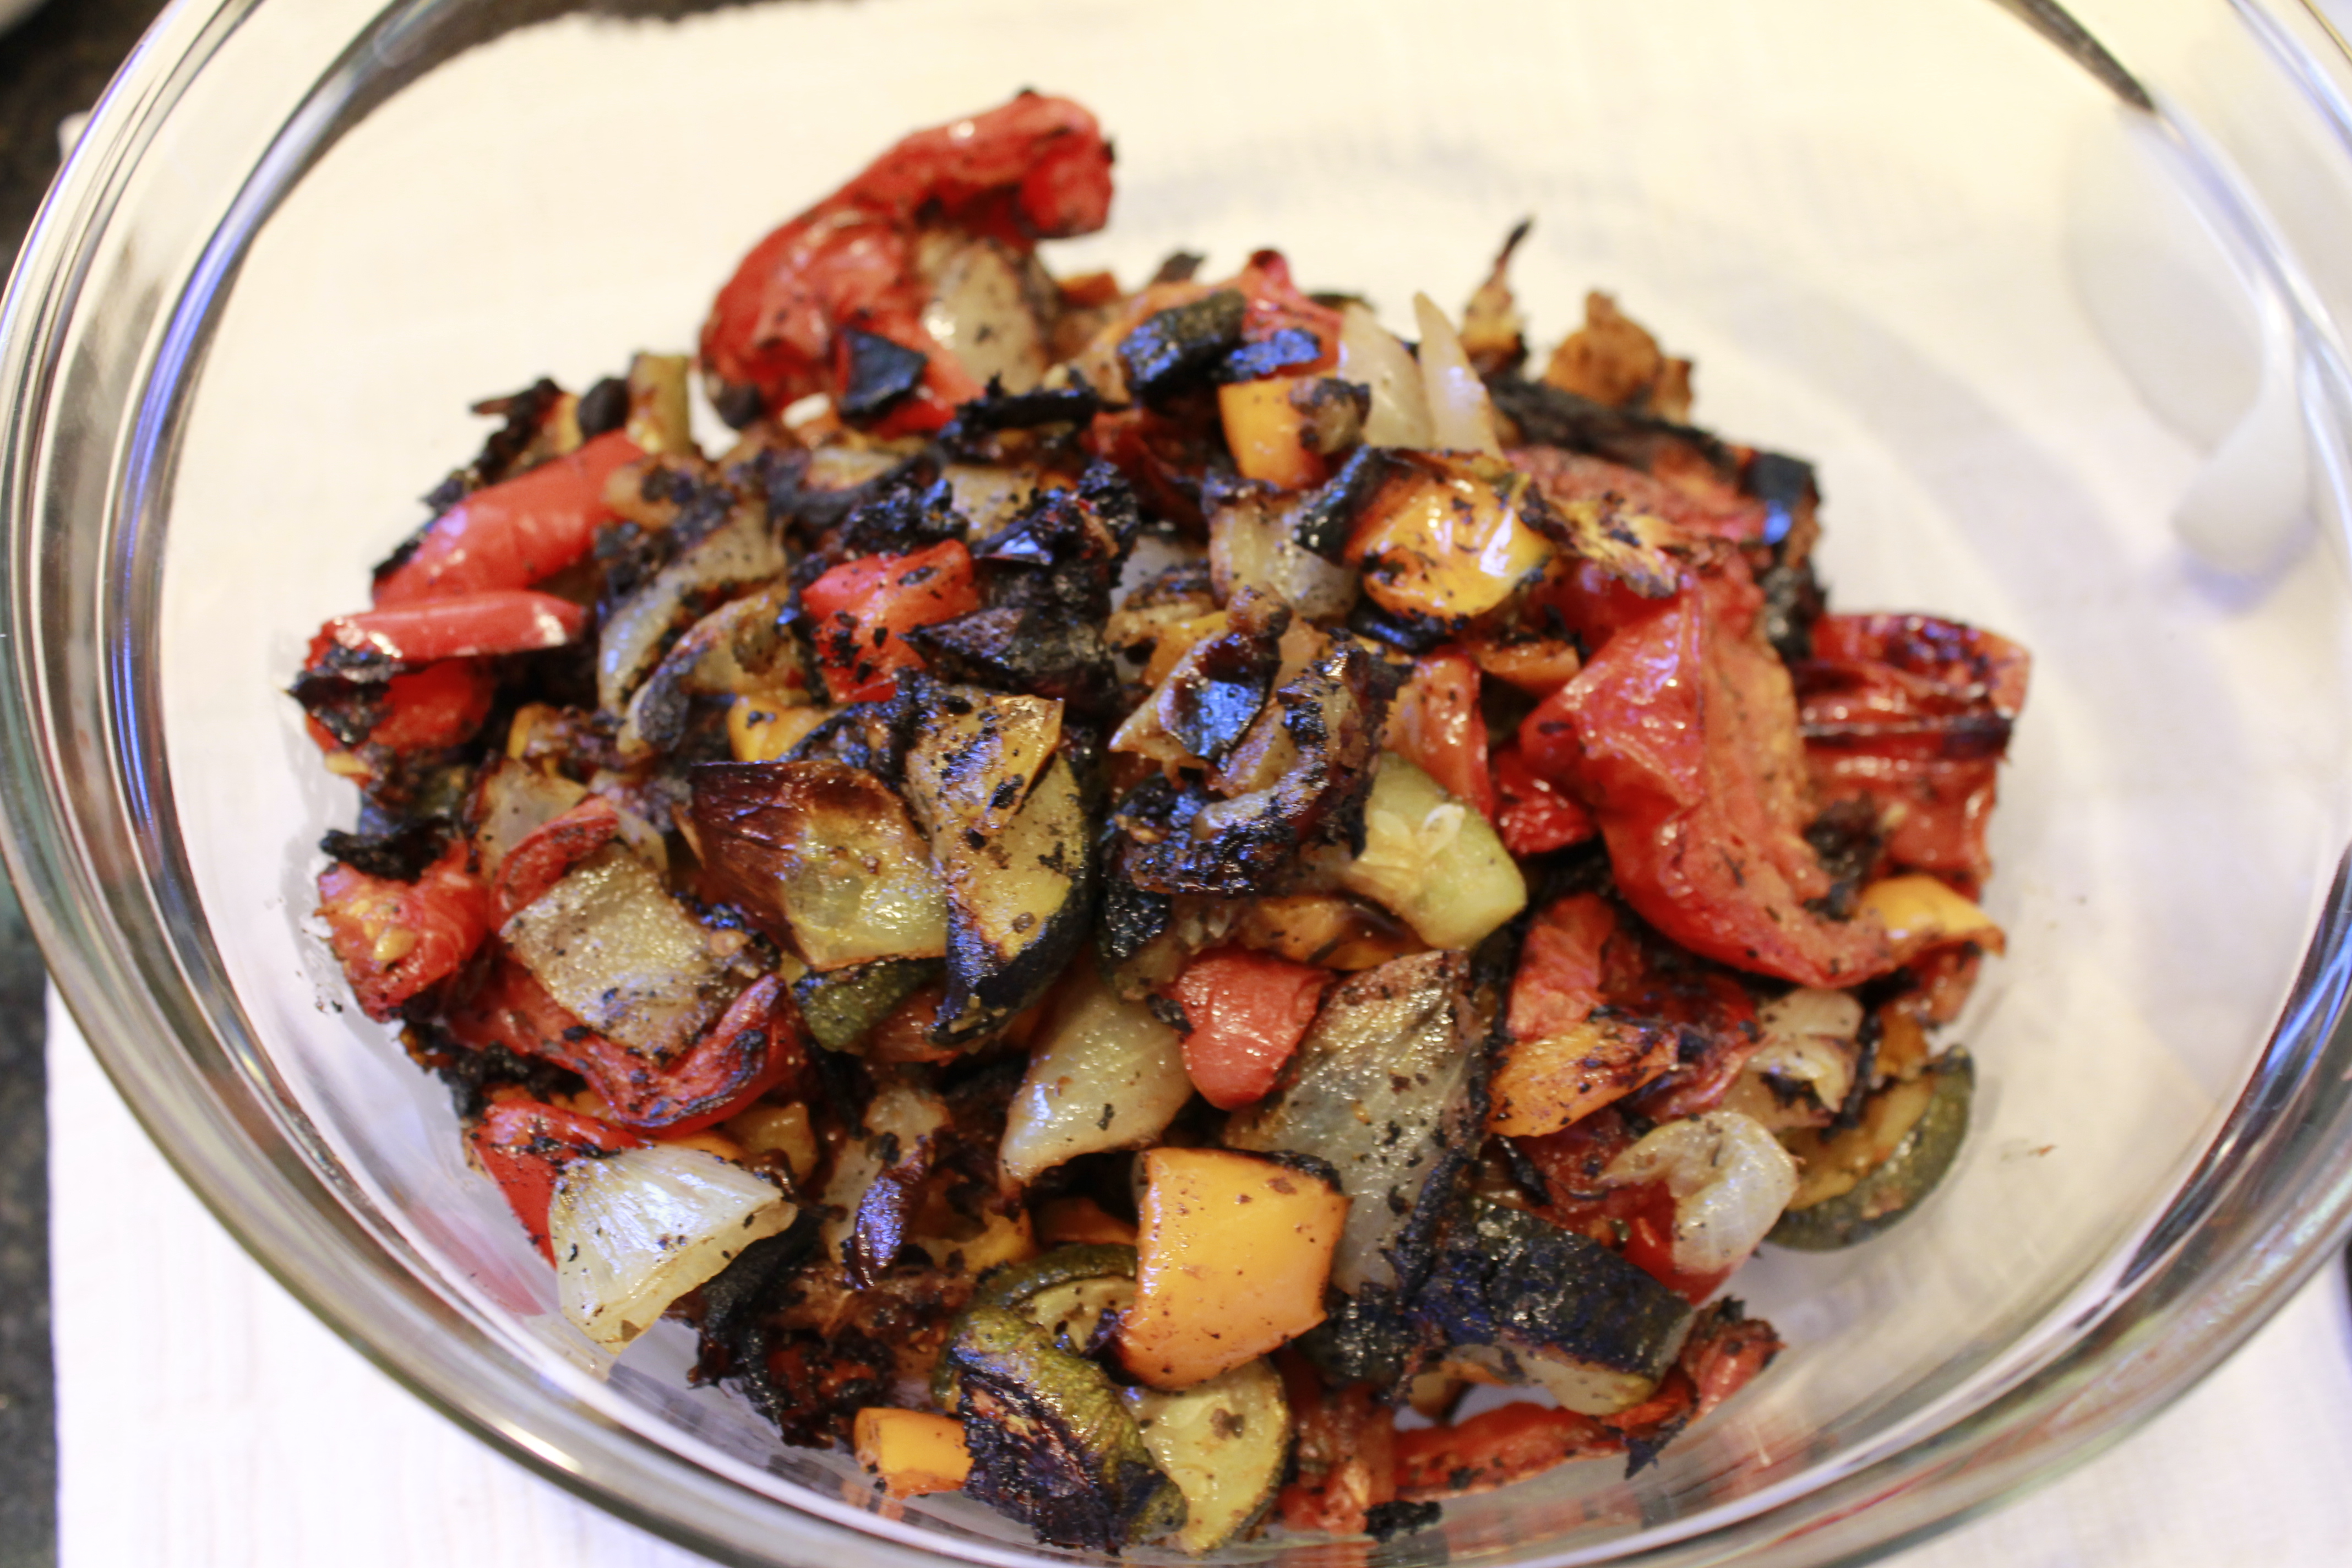
There is nothing like the flavor of roasted vegetables – marinated and blackened to a caramelized perfection to enhance any recipe you create. Roasted vegetables make a delicious and healthy snack as well as a wonderful addition to a sandwich, wrap, omelet, casserole, or any other culinary creation.
One of my personal favorites is roasted vegetables on homemade pizza. Since I am not a fan of “pizza sauce” on my pie, using roasted vegetables adds a burst of flavors that will change the way you think about processed sauces and fast food or store bought pizza, forever.
Roasting vegetables is easy. It’s also a great way to preserve them when their shelf life is coming to an end so that you can use them later. Simply refrigerate or freeze them.
How to Roast Vegetables
What you will need:
Preparation time: 15 to 30 minutes depending on the amount of veges you will need to wash and wedge.
Cook time: 30 to 60 minutes
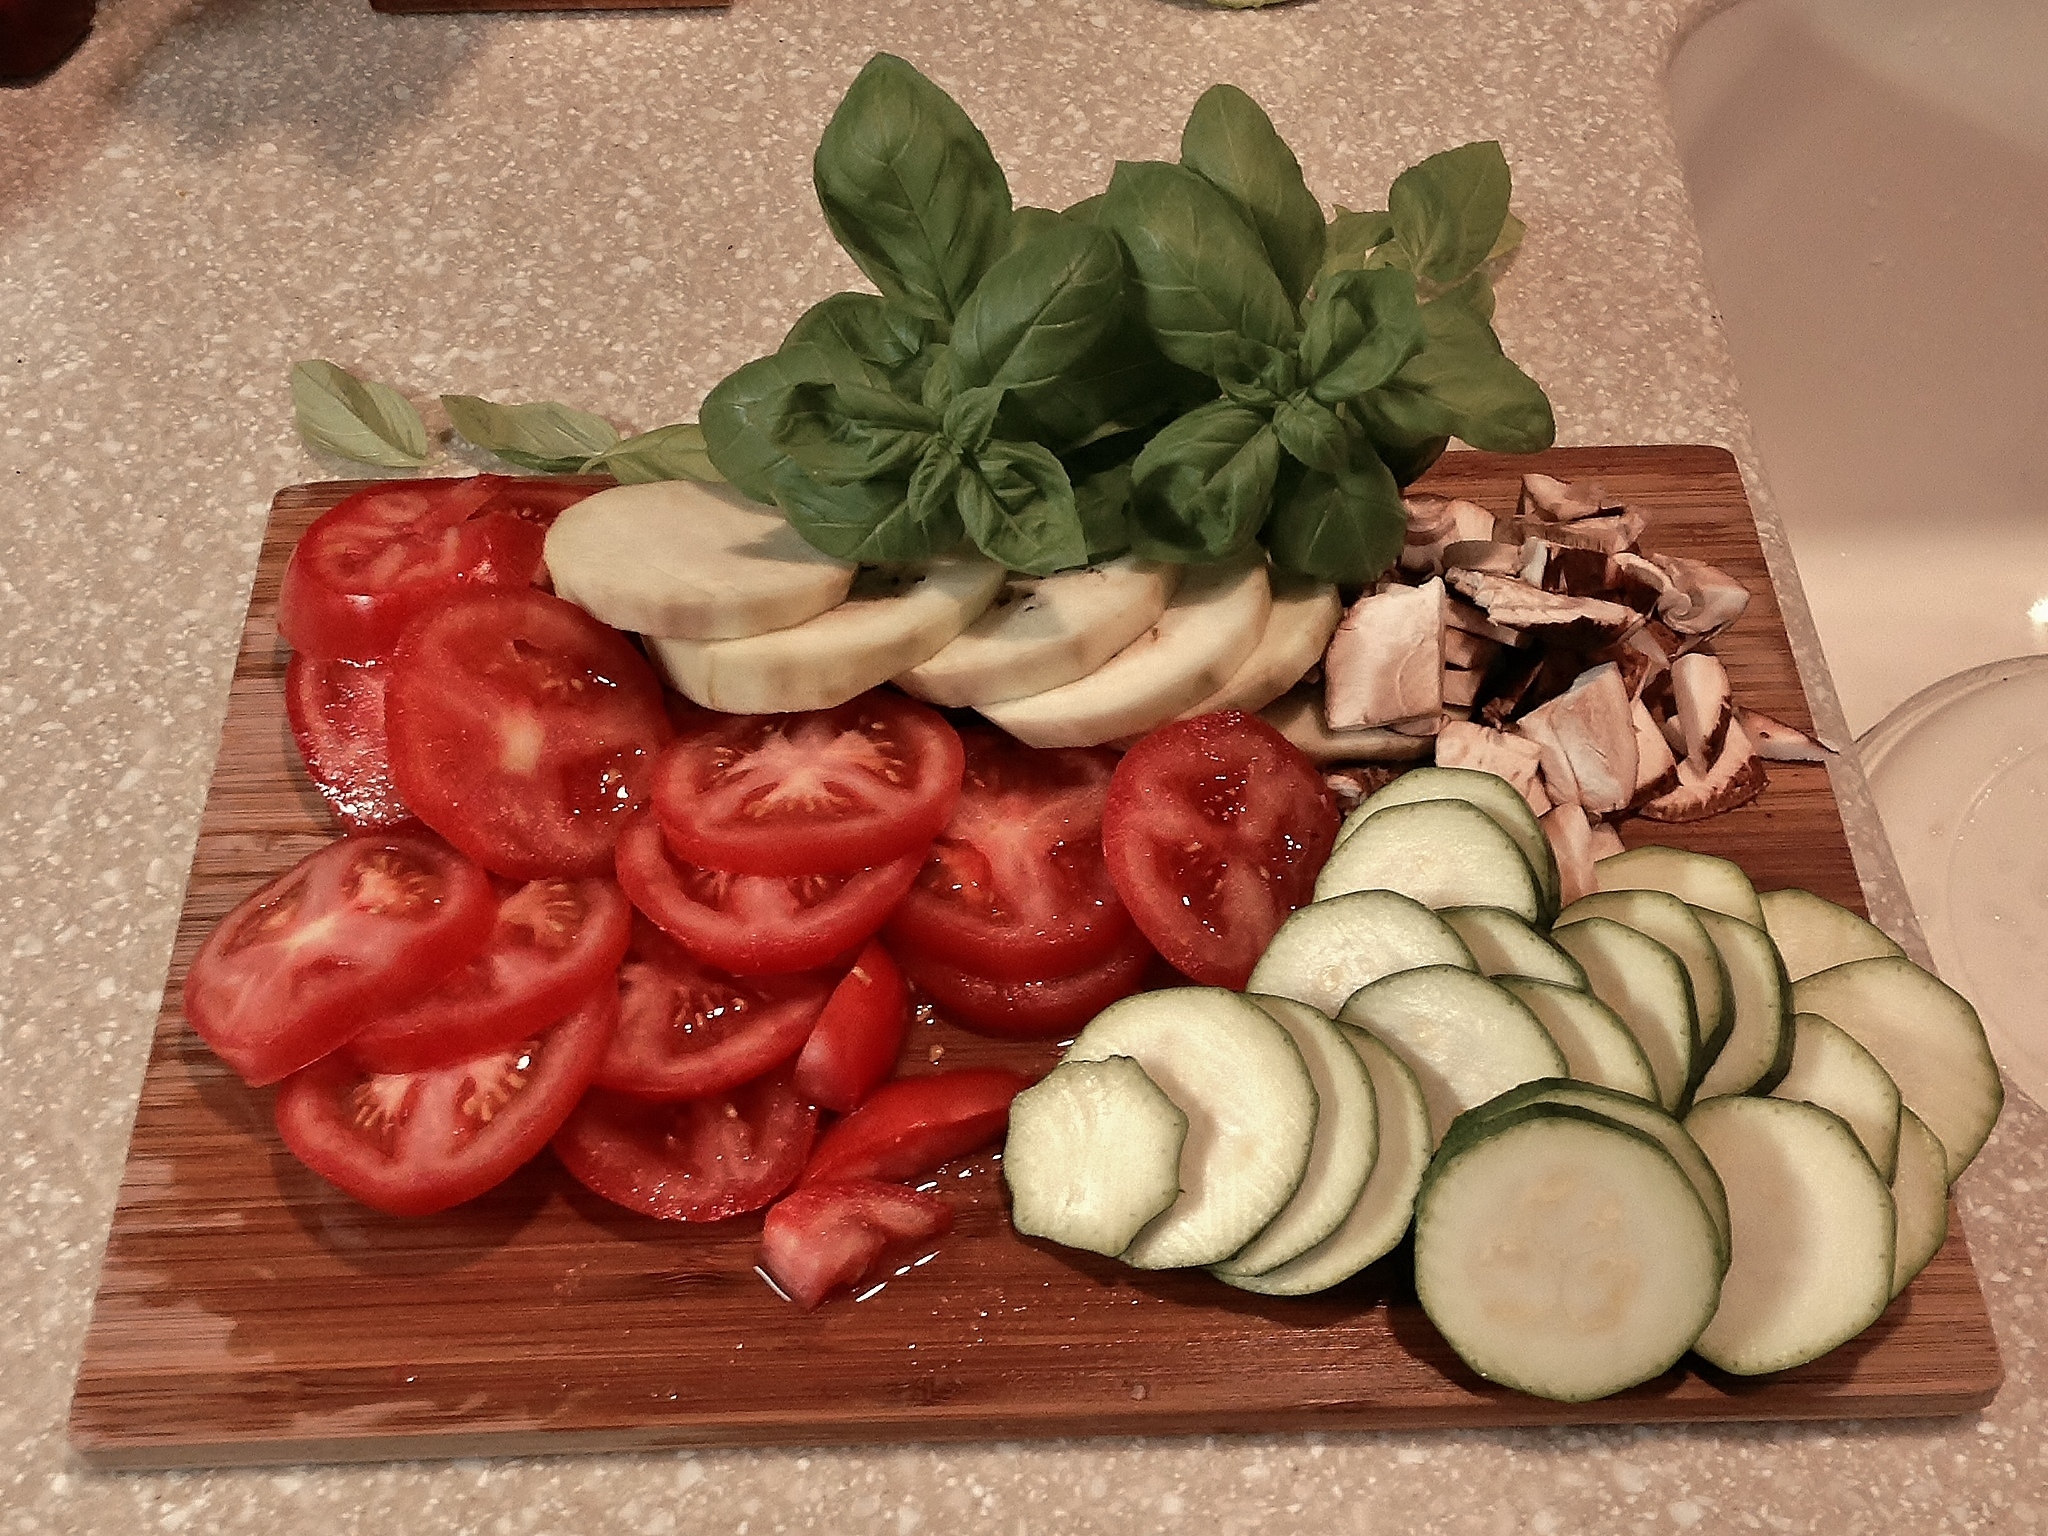
All vegetables can be used. I do my best to use fresh, organic vegetables which are fairly abundant these days and because of popularity, more affordable than in the past. I use zucchini (any and all squash), radishes, onions (any and all onions), tomatoes, green, red and yellow peppers (any and all peppers), eggplant, garlic, broccoli and cauliflower (great for snacks!), potatoes (small red, tubers or cut large. Great for meat dishes or breakfast casseroles). Anything not mentioned here? Give it a try! Pineapples and most other fruit are also delicious when roasted.
Kale, one of my favorites, will disintegrate when roasted in the oven. I peel the leaves from the stems and roast my kale in a skillet with garlic and very little olive oil until nice and crispy. This makes a great snack too.
Here’s what to do:
1. Wash all vegetables. Cut into approximately one inch wedges and place into large bowl. Too small a wedge the vegetables will disintegrate while roasting especially if you don’t use the parchment paper. They will stick to the pan and there won’t be much left of them when you scrape them off.
2. Add a small amount of olive oil and balsamic vinaigrette, basil, and pepper, just enough to coat all vegetables while hand tossing gently. Salt is always optional. A little goes a long way and is not heart healthy. Use salt sparingly and sprinkle over the top once vegetables are spread on sheet or omit all together.
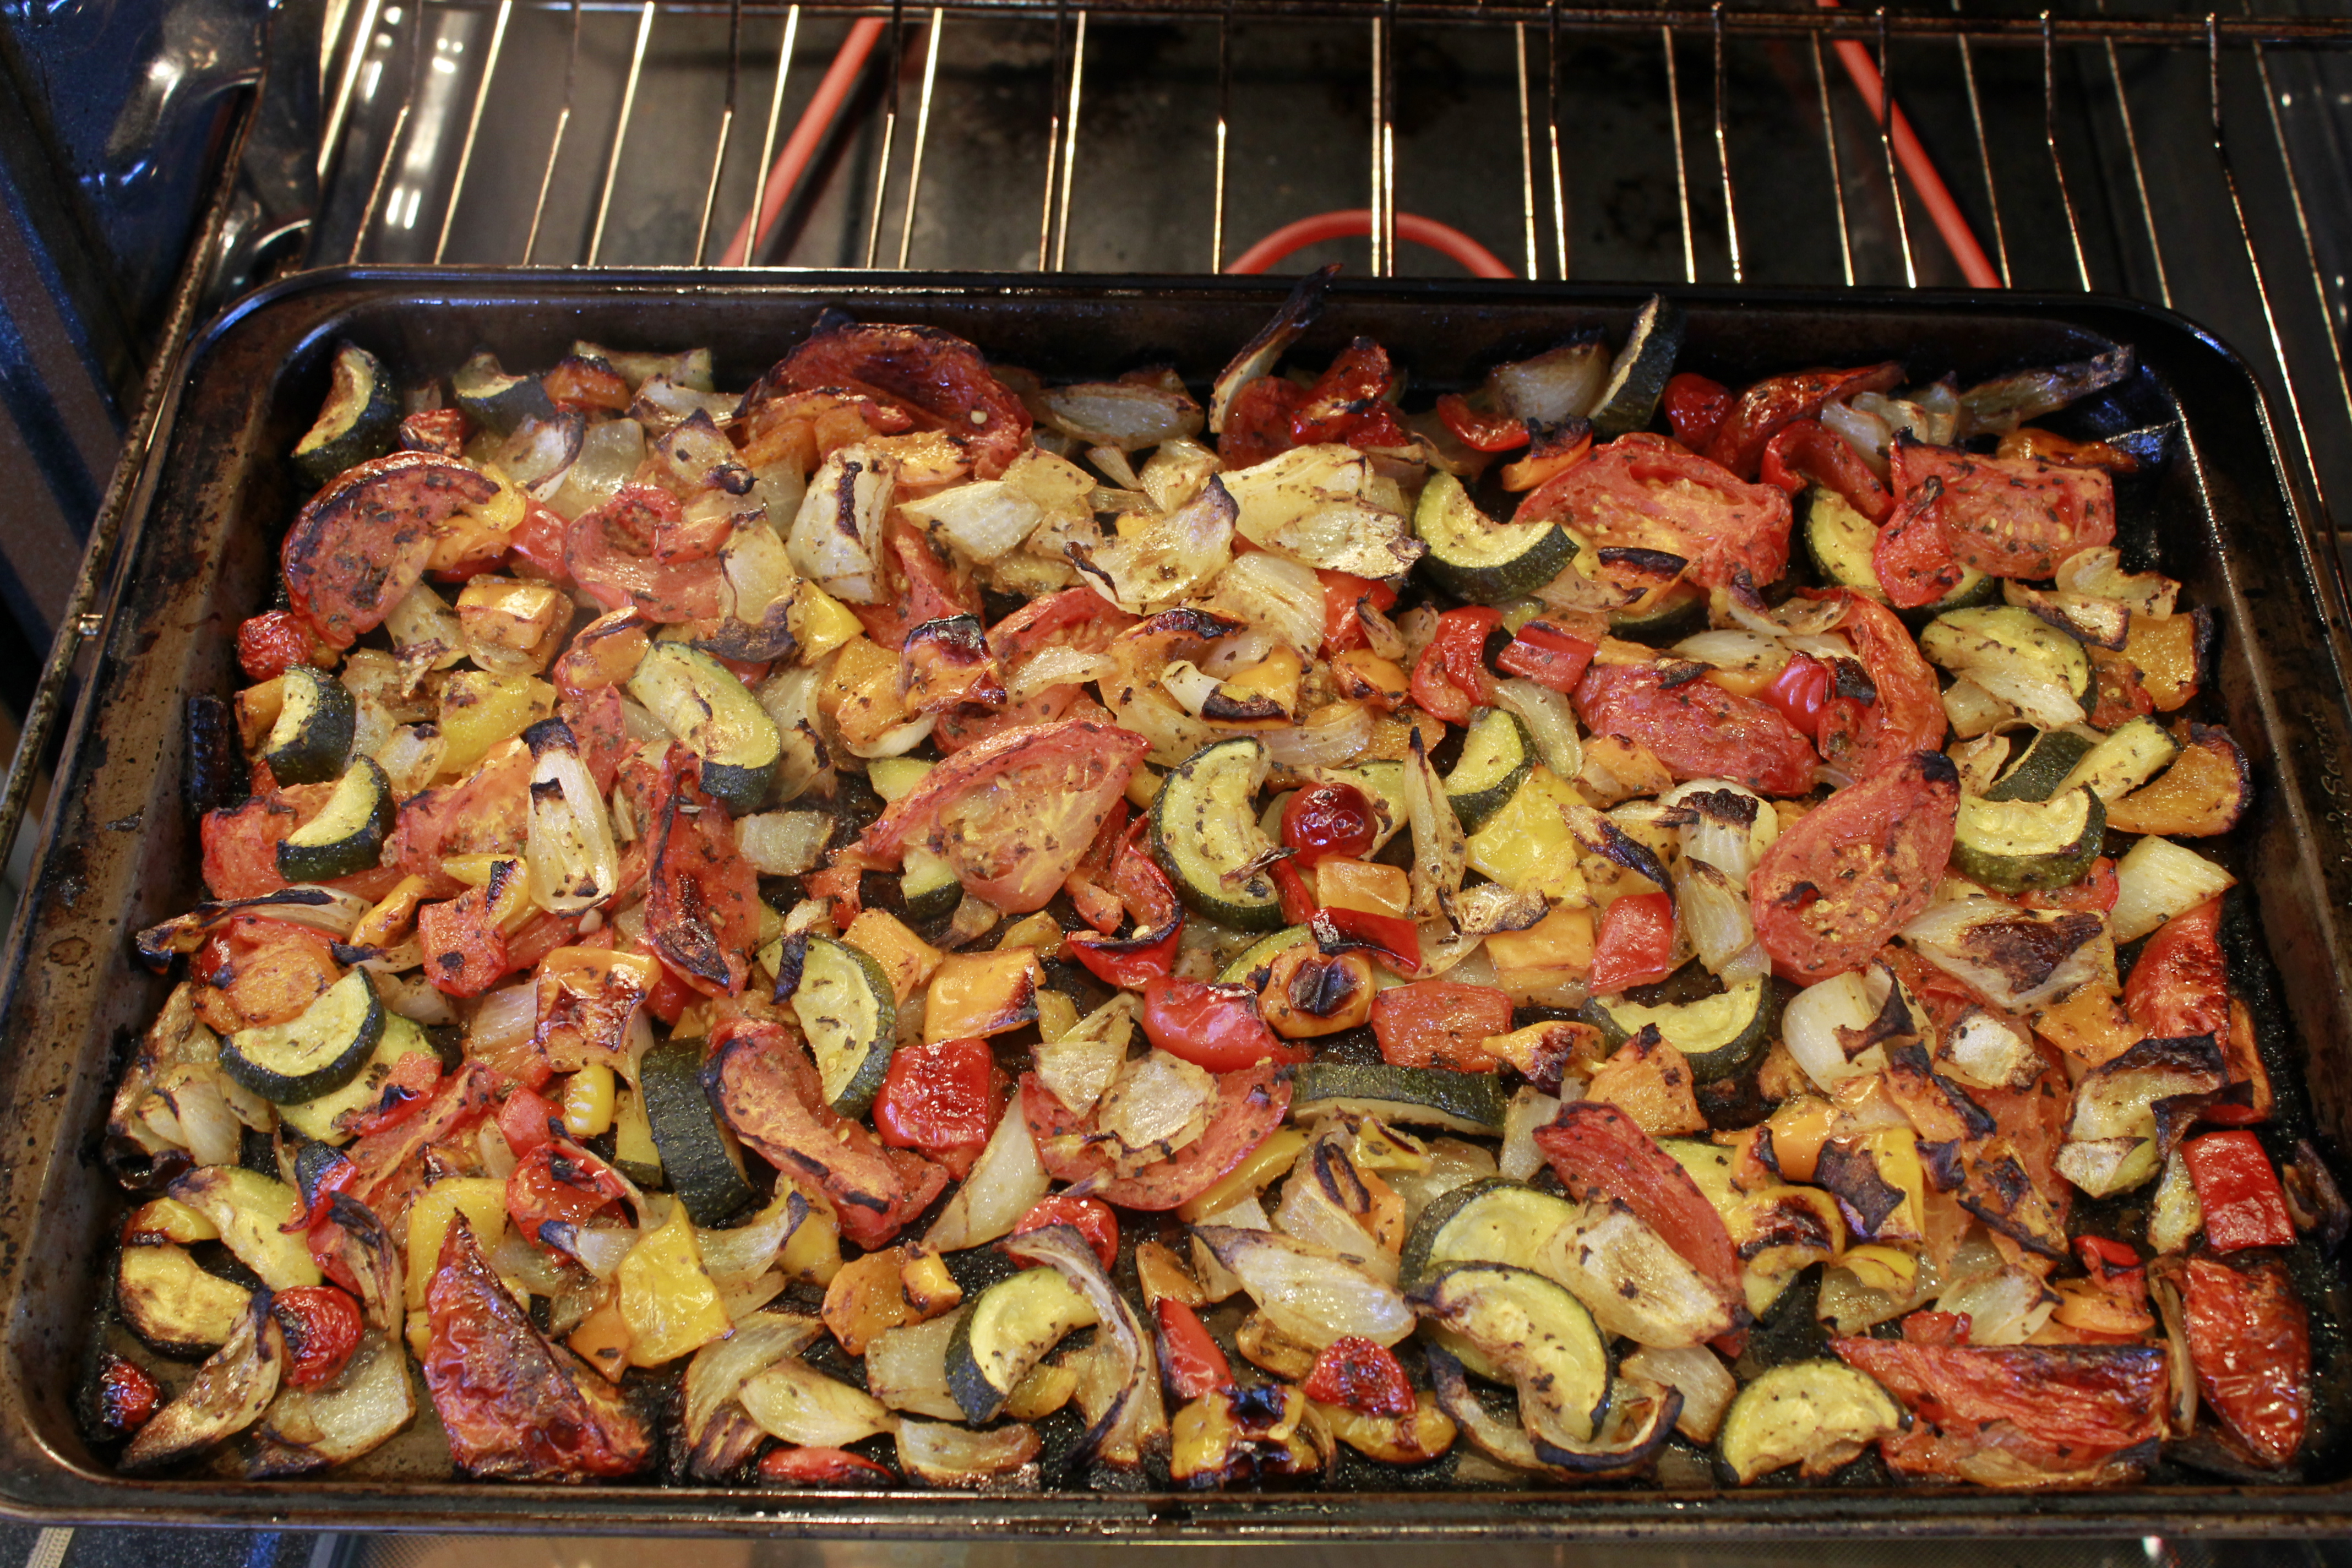
3. Line a large baking sheet with parchment paper. Trim excess paper from sides so it doesn’t scorch. *Please note – the maximum temperature for an oven when using parchment paper is 420 degrees. Spread vegetables out on parchment paper.
4. Roast vegetables at 420 degrees for up to 2 hours. Check in 30 minutes and turn with large spatula to allow all sides to be browned. Continue to cook until edges of onions become blackened and vegetables look caramelized. They will be fully cooked early on but the roasting takes longer.
5. Remove from oven and allow to cool.
Use vegetables as you would like for recipes. Onions, tomatoes and peppers give wonderful flavor for pizza. Potatoes and onions great with meat dishes, etc….
 After 30 minutes use spatula to turn vegetables
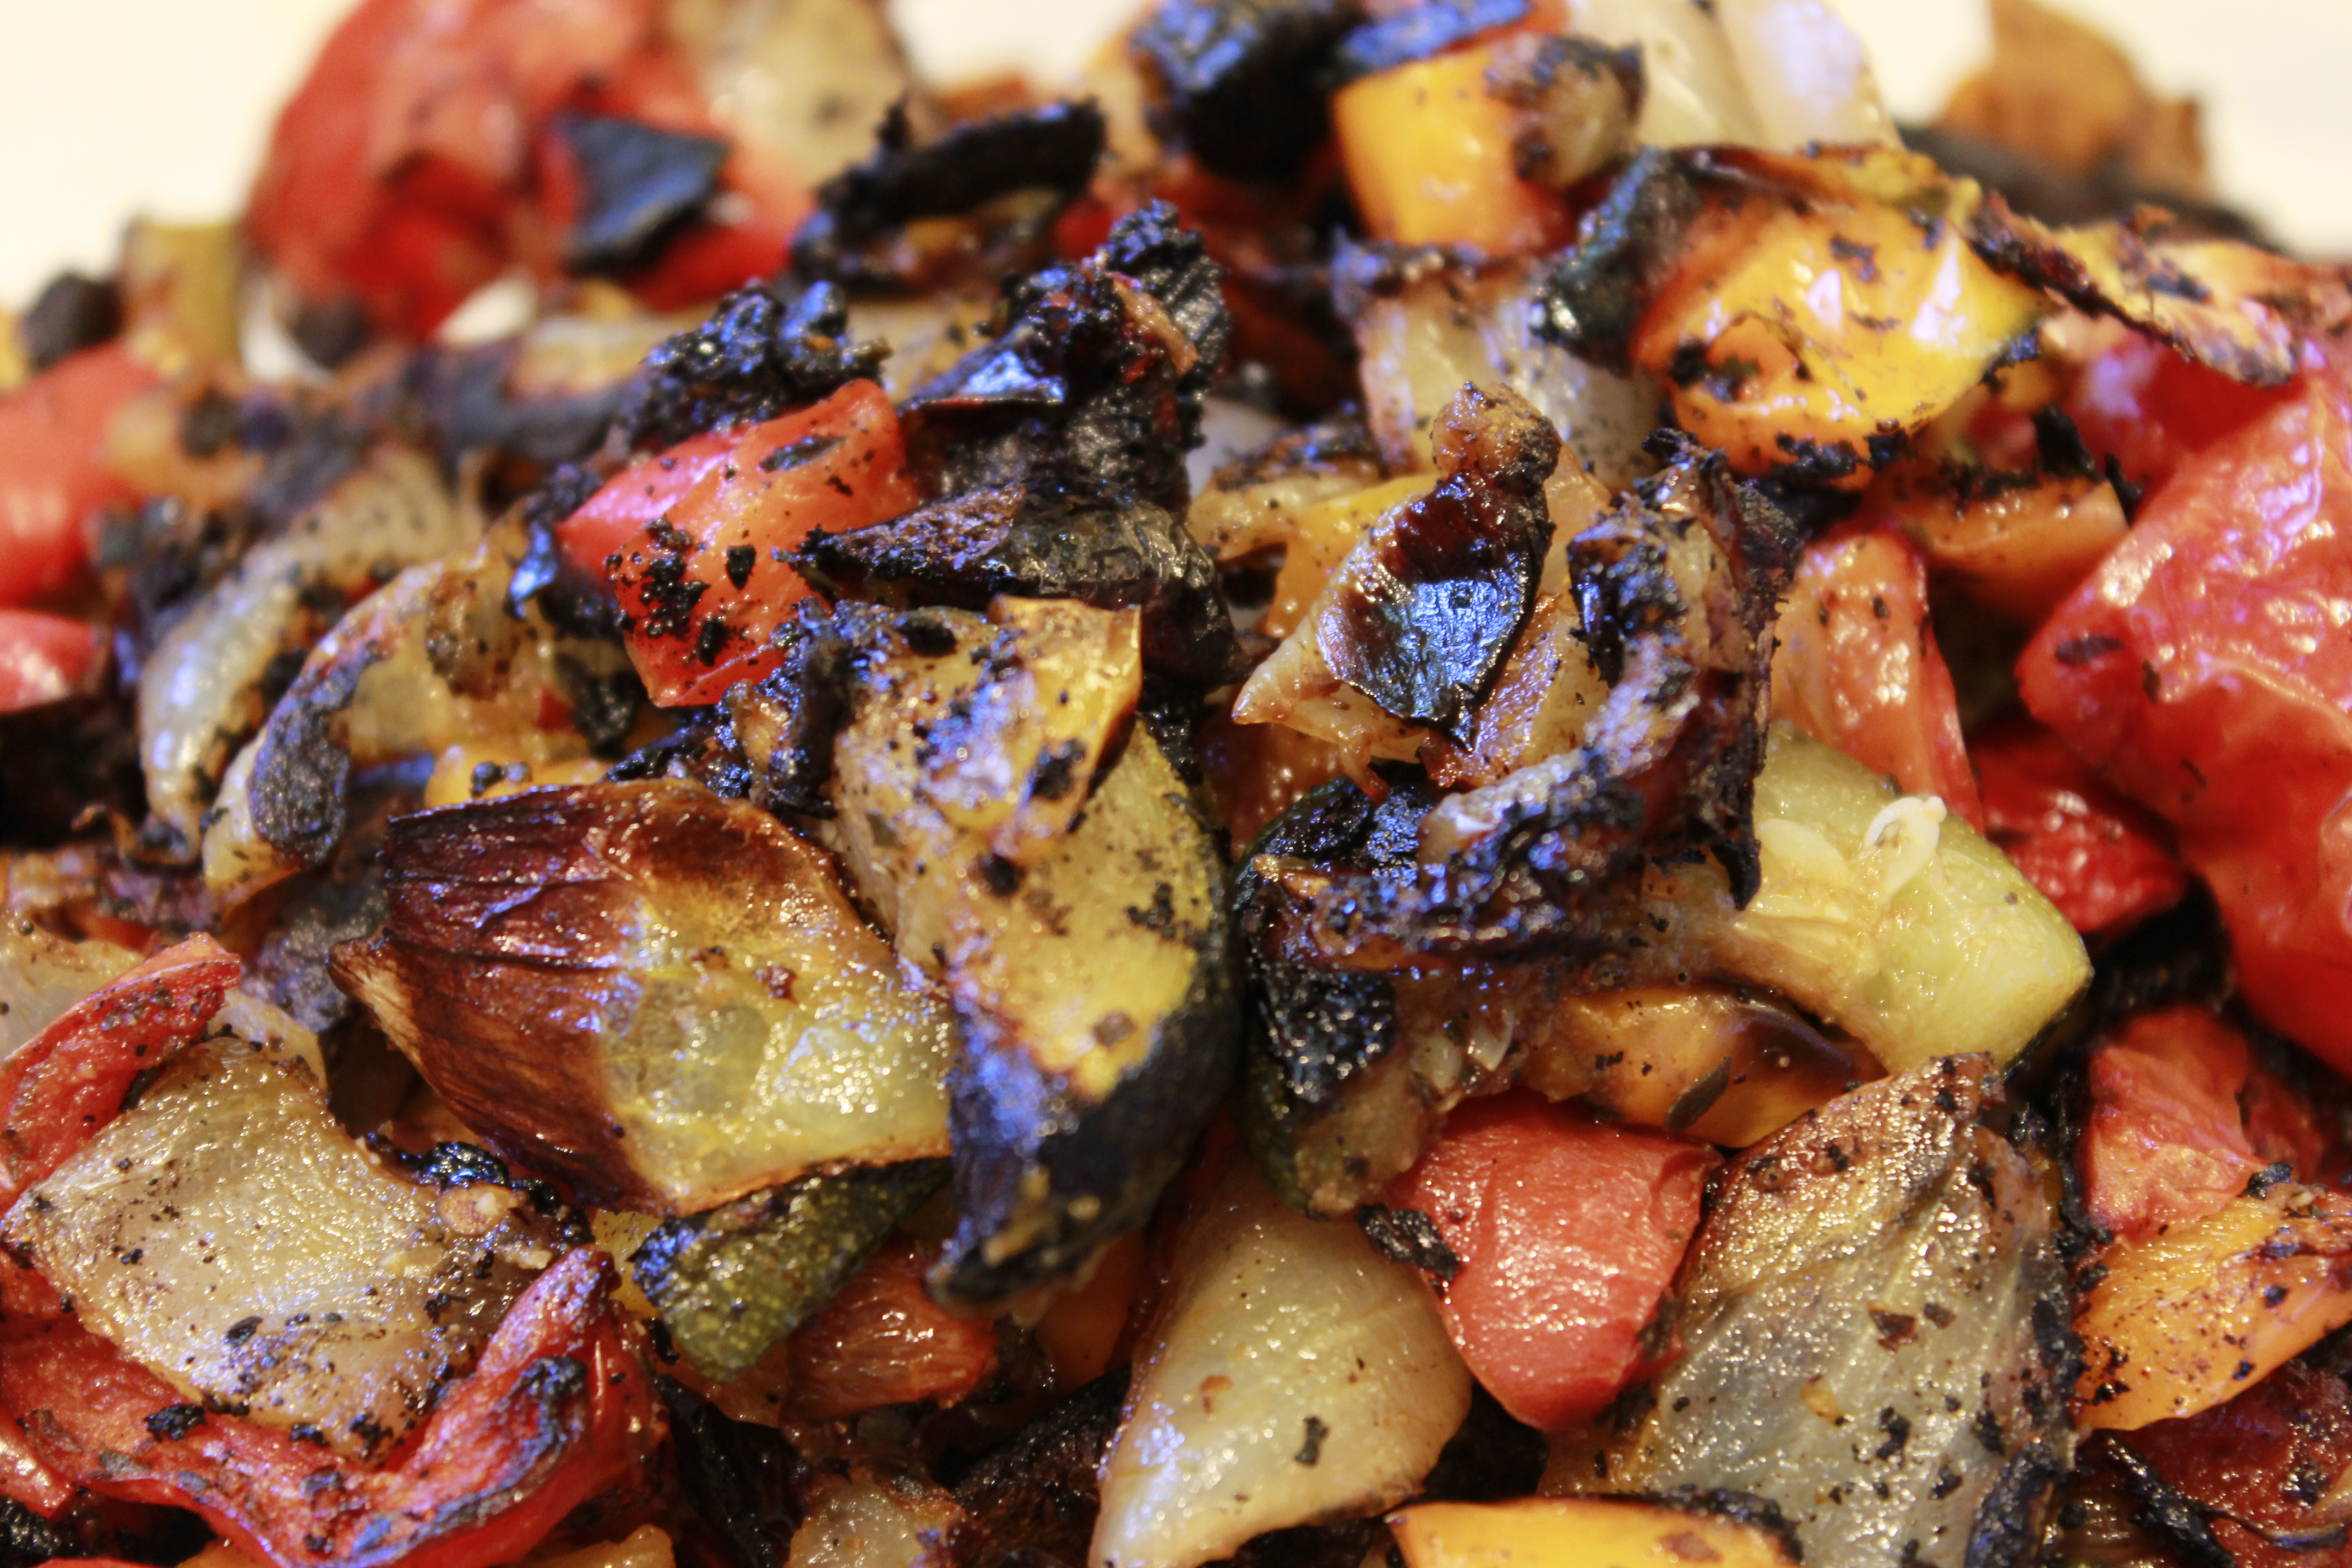 After 90 minutes – ready!
 Roasted crispy kale with garlic. Great as a snack by itself, on pizza, sandwiches and salads.
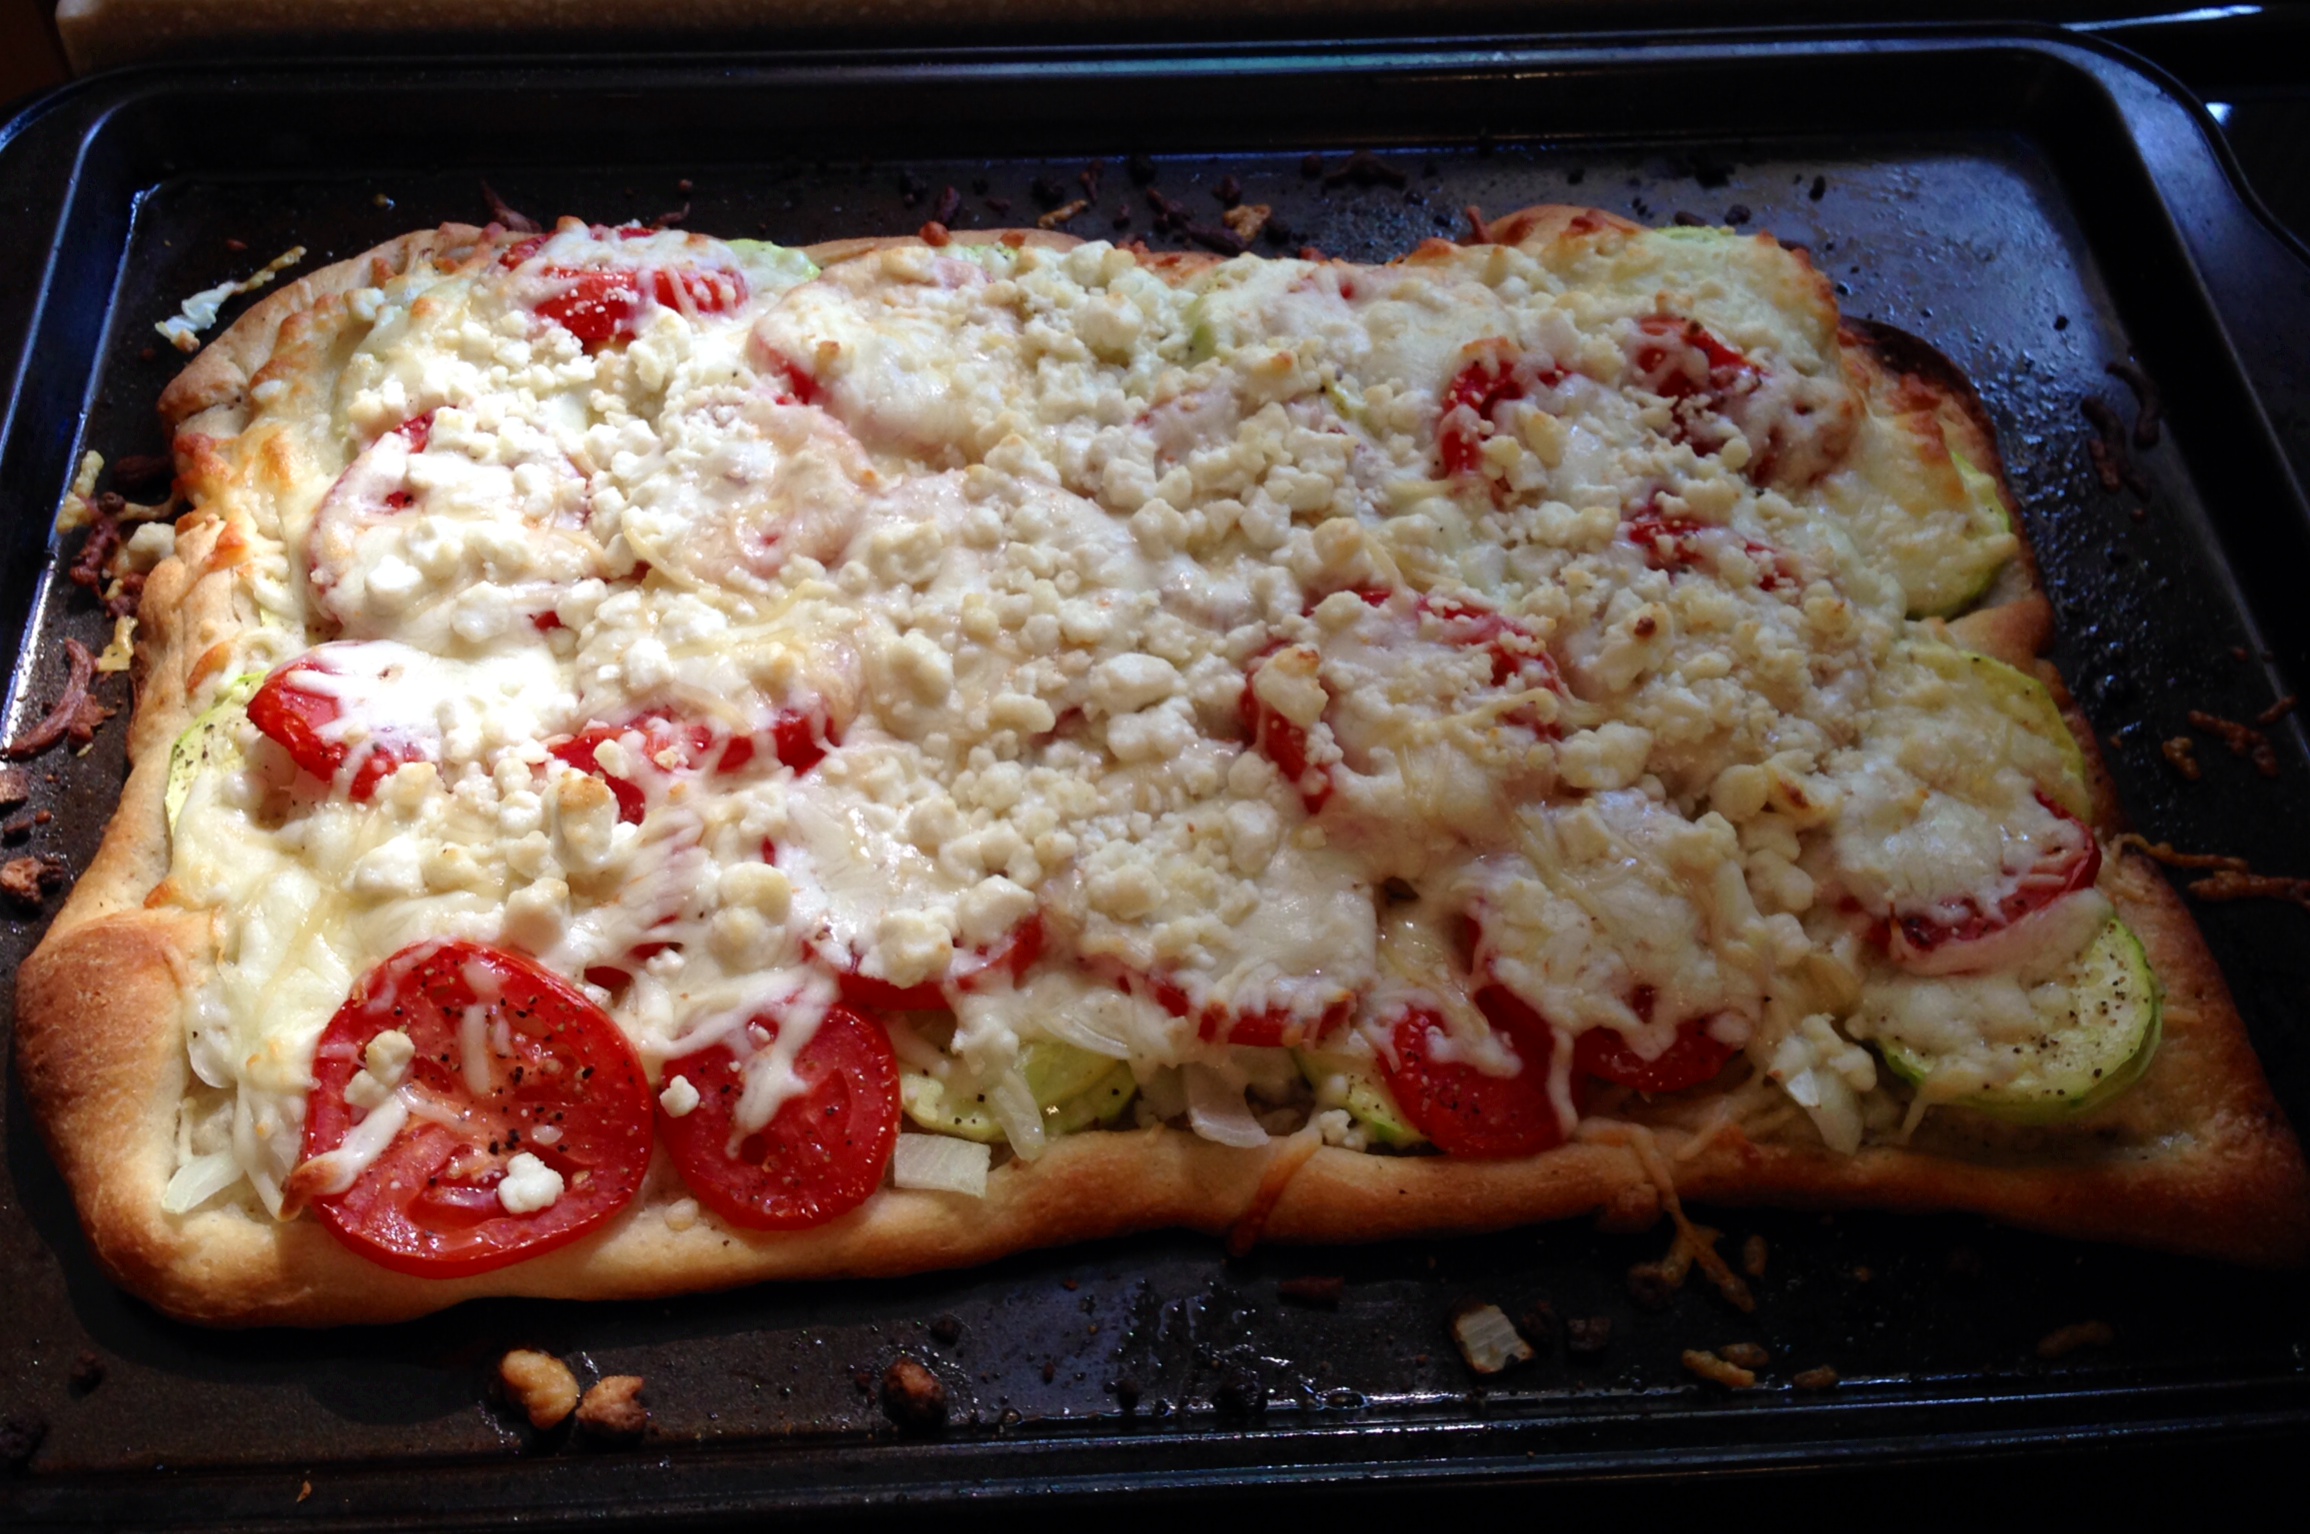
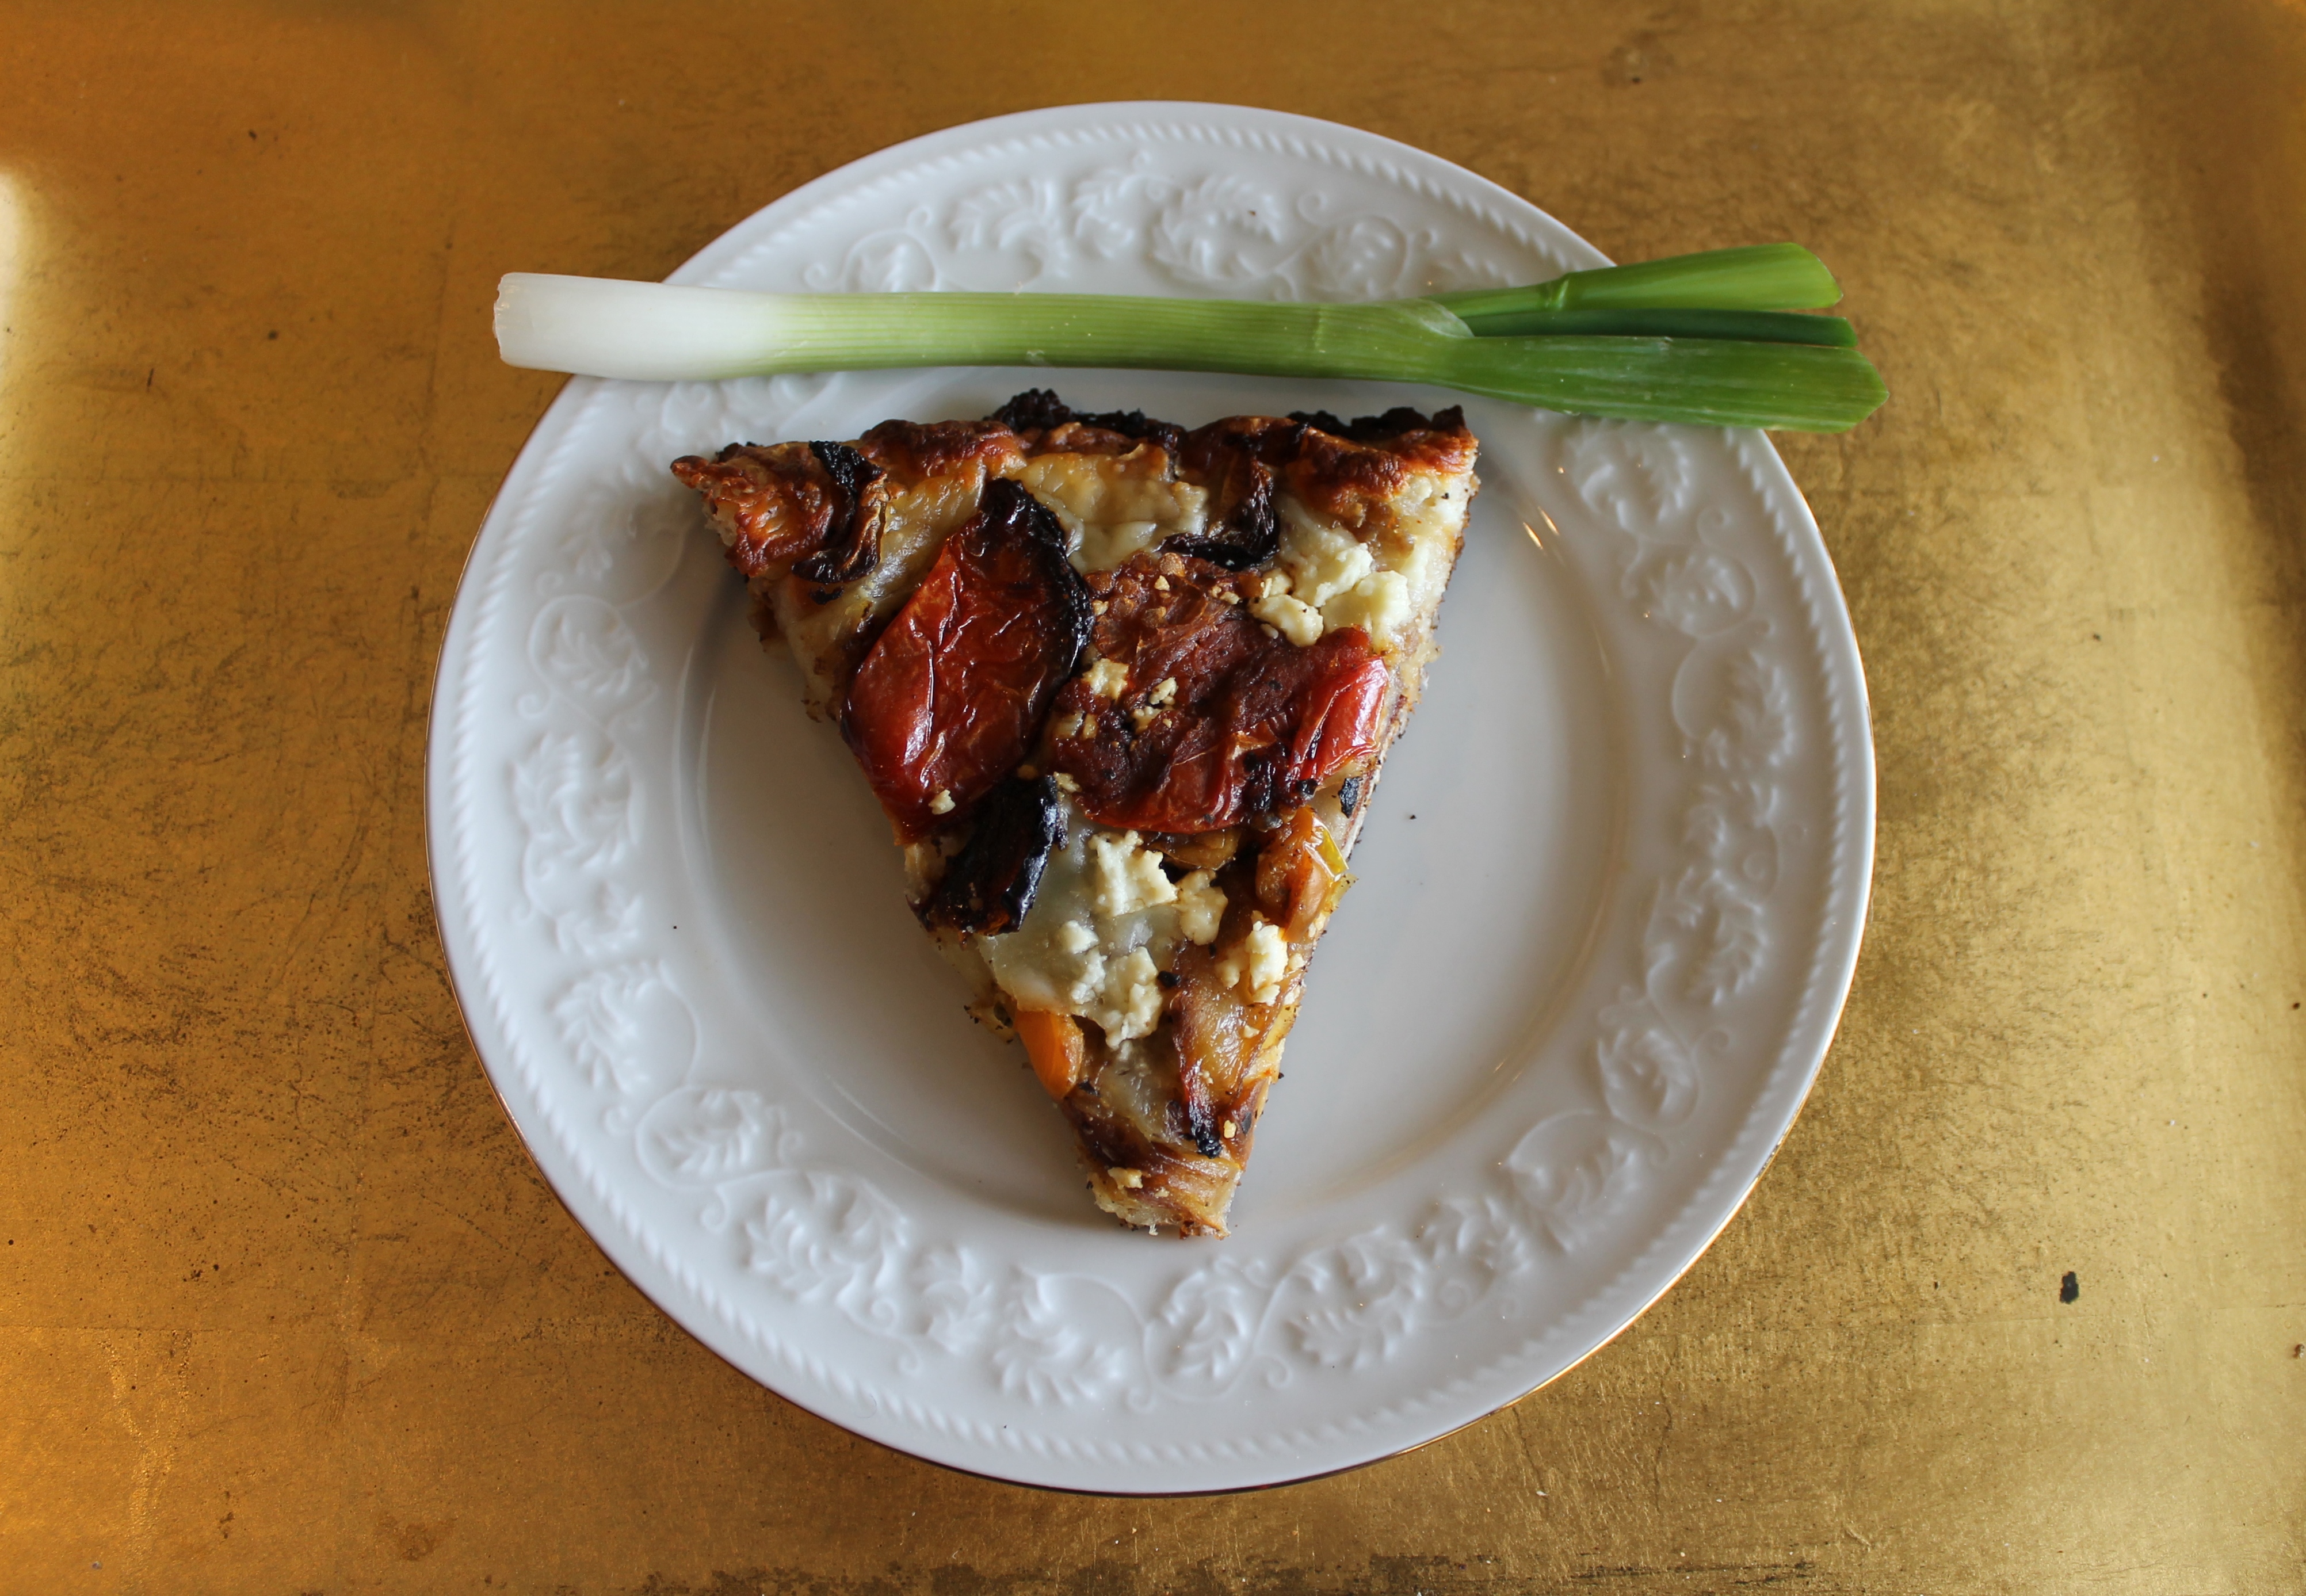 And one of my personal favorites – roasted tomatoes, onions and peppers with feta cheese on whole grain crust. It’s great with goat cheese too! So good!
I’d love to hear your questions or feedback under comments.
Thanks so much for visiting!
Bon Appetit! (My mom would always say this to me.)
Kim

[gmc_recipe 692]

 I saw my very first popover earlier this year when my husband, Manuel, and I were visiting the Beaufort Inn, a charming B&B in historic Beaufort, SC. I was raised in the south for the better part of my years and was quite surprised that I had never seen one. My mother had many culinary diversities but I don’t remember ever seeing a popover.

 The recipe called for 6 eggs. Mine were small so I used 7.
 I mixed all ingredients together but did not over mix as the recipe advised.
 Divided evenly into the cups. I filled them as much as I could.
 Yum!
Yum! Secret Taster (My husband, Manuel.)
Ingredients
*So do you get the idea? You can use any amount of any vegetable you want. Same goes with cheese. This is your pizza. Be creative!

Directions


Voila!
Bon Apetit!
XO! Kim
